Table of Contents
Upgrading your home with GFCI outlet covers can be one of the most beneficial improvements you make, both for safety and aesthetics. Whether you’re a seasoned DIY enthusiast or just starting out, understanding the ins and outs of GFCI outlet covers can save you time, money, and a lot of headaches. This guide will walk you through everything you need to know about GFCI outlet covers, from basic installation to advanced troubleshooting.
1. Understanding GFCI Outlets
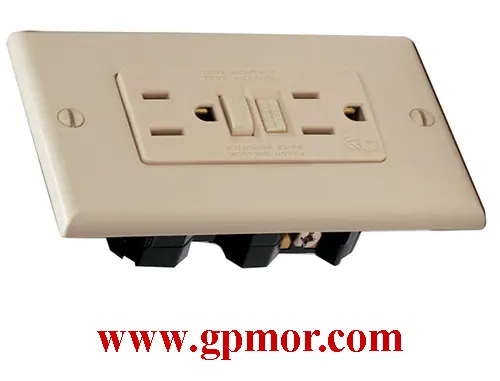
A Ground Fault Circuit Interrupter (GFCI) outlet is designed to protect against electrical shock by shutting off power when it detects a ground fault. These outlets are particularly important in areas where water and electricity are in close proximity, such as bathrooms, kitchens, and outdoor spaces.
2. Why GFCI Outlet Covers Matter

GFCI outlet covers not only protect the outlet itself from damage and dust but also enhance the overall safety by preventing accidental contact with live wires. This is especially crucial in homes with children or pets.
3. Types of GFCI Outlet Covers

There are various types of GFCI outlet covers available, including:
– Standard Covers: Basic protection for indoor outlets.
– Weatherproof Covers: Designed for outdoor use, these covers protect against rain, snow, and other elements.
– In-Use Covers: These allow the outlet to be used while still providing weatherproof protection.
4. Choosing the Right GFCI Outlet Cover

When selecting a GFCI outlet cover, consider the following factors:
– Location: Indoor or outdoor use.
– Size: Ensure it fits your outlet type (single, double, etc.).
– Material: Durable materials like polycarbonate for outdoor use.
5. Installation Process
Installing a GFCI outlet cover is relatively straightforward. Here’s a quick guide:
1. Turn Off the Power: Always turn off the power at the circuit breaker before starting.
2. Remove the Old Cover: Unscrew the old cover plate.
3. Install the GFCI Outlet: If you’re replacing an old outlet, install the new GFCI outlet first.
4. Attach the New Cover: Screw in the new GFCI outlet cover, ensuring it is secure.
6. Safety Standards and Codes
Be aware of the latest electrical codes and standards. Recent updates require tamper-resistant outlets and may necessitate arc fault circuit interrupters (AFCIs) in certain areas. Consult with an electrician to ensure compliance.
7. Troubleshooting Common Issues
Common issues with GFCI outlets and covers include:
– Loose Connections: Ensure all screws and wires are tightly secured.
– Tripping Breakers: This could be due to a ground fault or a faulty GFCI outlet.
– Improper Fit: Make sure the cover matches the outlet and box size.
8. Enhancing Aesthetics
Replacing old, discolored outlets and covers can significantly improve the look of your home. Opt for fresh white covers for a clean, modern look or match the color to your decor for a seamless appearance.
9. Maintenance Tips
Regular maintenance can prolong the life of your GFCI outlets and covers:
– Regular Inspection: Check for signs of wear and tear.
– Cleaning: Wipe down the covers to prevent dust buildup.
– Testing: Use the test button on your GFCI outlets monthly to ensure they’re functioning correctly.
10. DIY vs. Professional Installation
While installing a GFCI outlet cover is a manageable DIY project, more complex installations or troubleshooting may require professional help. Hiring a licensed electrician ensures the job is done safely and up to code.
Conclusion
Upgrading your home with GFCI outlet covers is a smart investment in safety and style. By following this comprehensive guide, you can ensure your outlets are both functional and aesthetically pleasing. Whether you’re tackling a full home renovation or just updating a few outlets, these tips will help you achieve professional results.
With these insights, you can confidently enhance your home with GFCI outlet covers, ensuring a safer and more attractive living space.
Related Links
Weatherproof Outdoor Outlet Covers – Don’t Use the Wrong Type!

